Participation management covers the complete flow of a member's participation in an activity, and goes through following steps, also the different lists on the Activity:
- Guests RSVP
List of invitations and RSVP status - Registrations
The status of registrations, cancellations, waiting list - Attendance - also with Mobile view and attendance slider
Convenient attendance list to use during the activity - Billing
Full billing interface with totals for Members and Guests
Also at the bottom of this topic is a method of how to deal with Waiting Lists.
And a separate type: Activity - External Organization.
Invited guests RSVP
After sending an Invitation, you can track the status of Invitees here, with indication of their RSVP status.

With the RSVP column now including a convenient admin edit option.

Entries
After Registration, invitees can be tracked in terms of status with Participants.
And this in two views:
Administration
The pure administration of registrations with indication of admin info: registration time, possible deregistration, a two sliders(Billing and Payment) and Actions (Info and Delete).

Member information
The second view (Member Information tab) provides additional info around the member including from the Meta Fields.
Which fields appear here is determined on the Member Management:
- Administration / Member Management - Button Display

Attendances
The Attendance list is then more likely to be used during the activity itself to register attendees.
This is also then with a Mobile View, useful for use on smartphone or Tablet.
This list is controlled from the Advanced Settings.

With here the ability to precisely track In/out timing.

And also checking the presence of a QR scan (ID, ...)
Attendance Tracking – QR Code
Closed-loop registration, if you are using the Attendance Register setting.
- QR Code integration: generation of a unique QR code (displayed on the individual registration)
- Display QR code: on the Confirmation – use #qrcode
(Email text – Activity Confirmation or Activity / Communication – Confirmation) - Quick Check-in: Scanning this code at the registration desk automatically records the exact time of arrival and departure.
- Scan: No separate scanner is needed; an iPhone (iOS) or smartphone (Android) is sufficient
- Coming soon: This data will be seamlessly transferred to the upcoming Attendance Certificate reporting module.
With the following registration check and status indicators
Scan – In
- Green: Valid scan of a registration
- Orange: Scanning the same QR code again – "Already Registered" warning
- Red: scanned an incorrect QR code – warning: “Not registered”
Scan – Out
- Green: Person successfully scanned – scan timing indicator
- Orange: Person has not yet been scanned – warning: person's name
- Orange: Person had already been eliminated – warning: person's name
- Red: QR code not recognized – "Not registered" warning
Waiting list management
Within Klubs, activities have a waiting list management.
[The use of Waiting Lists is managed through an Advanced Setting]
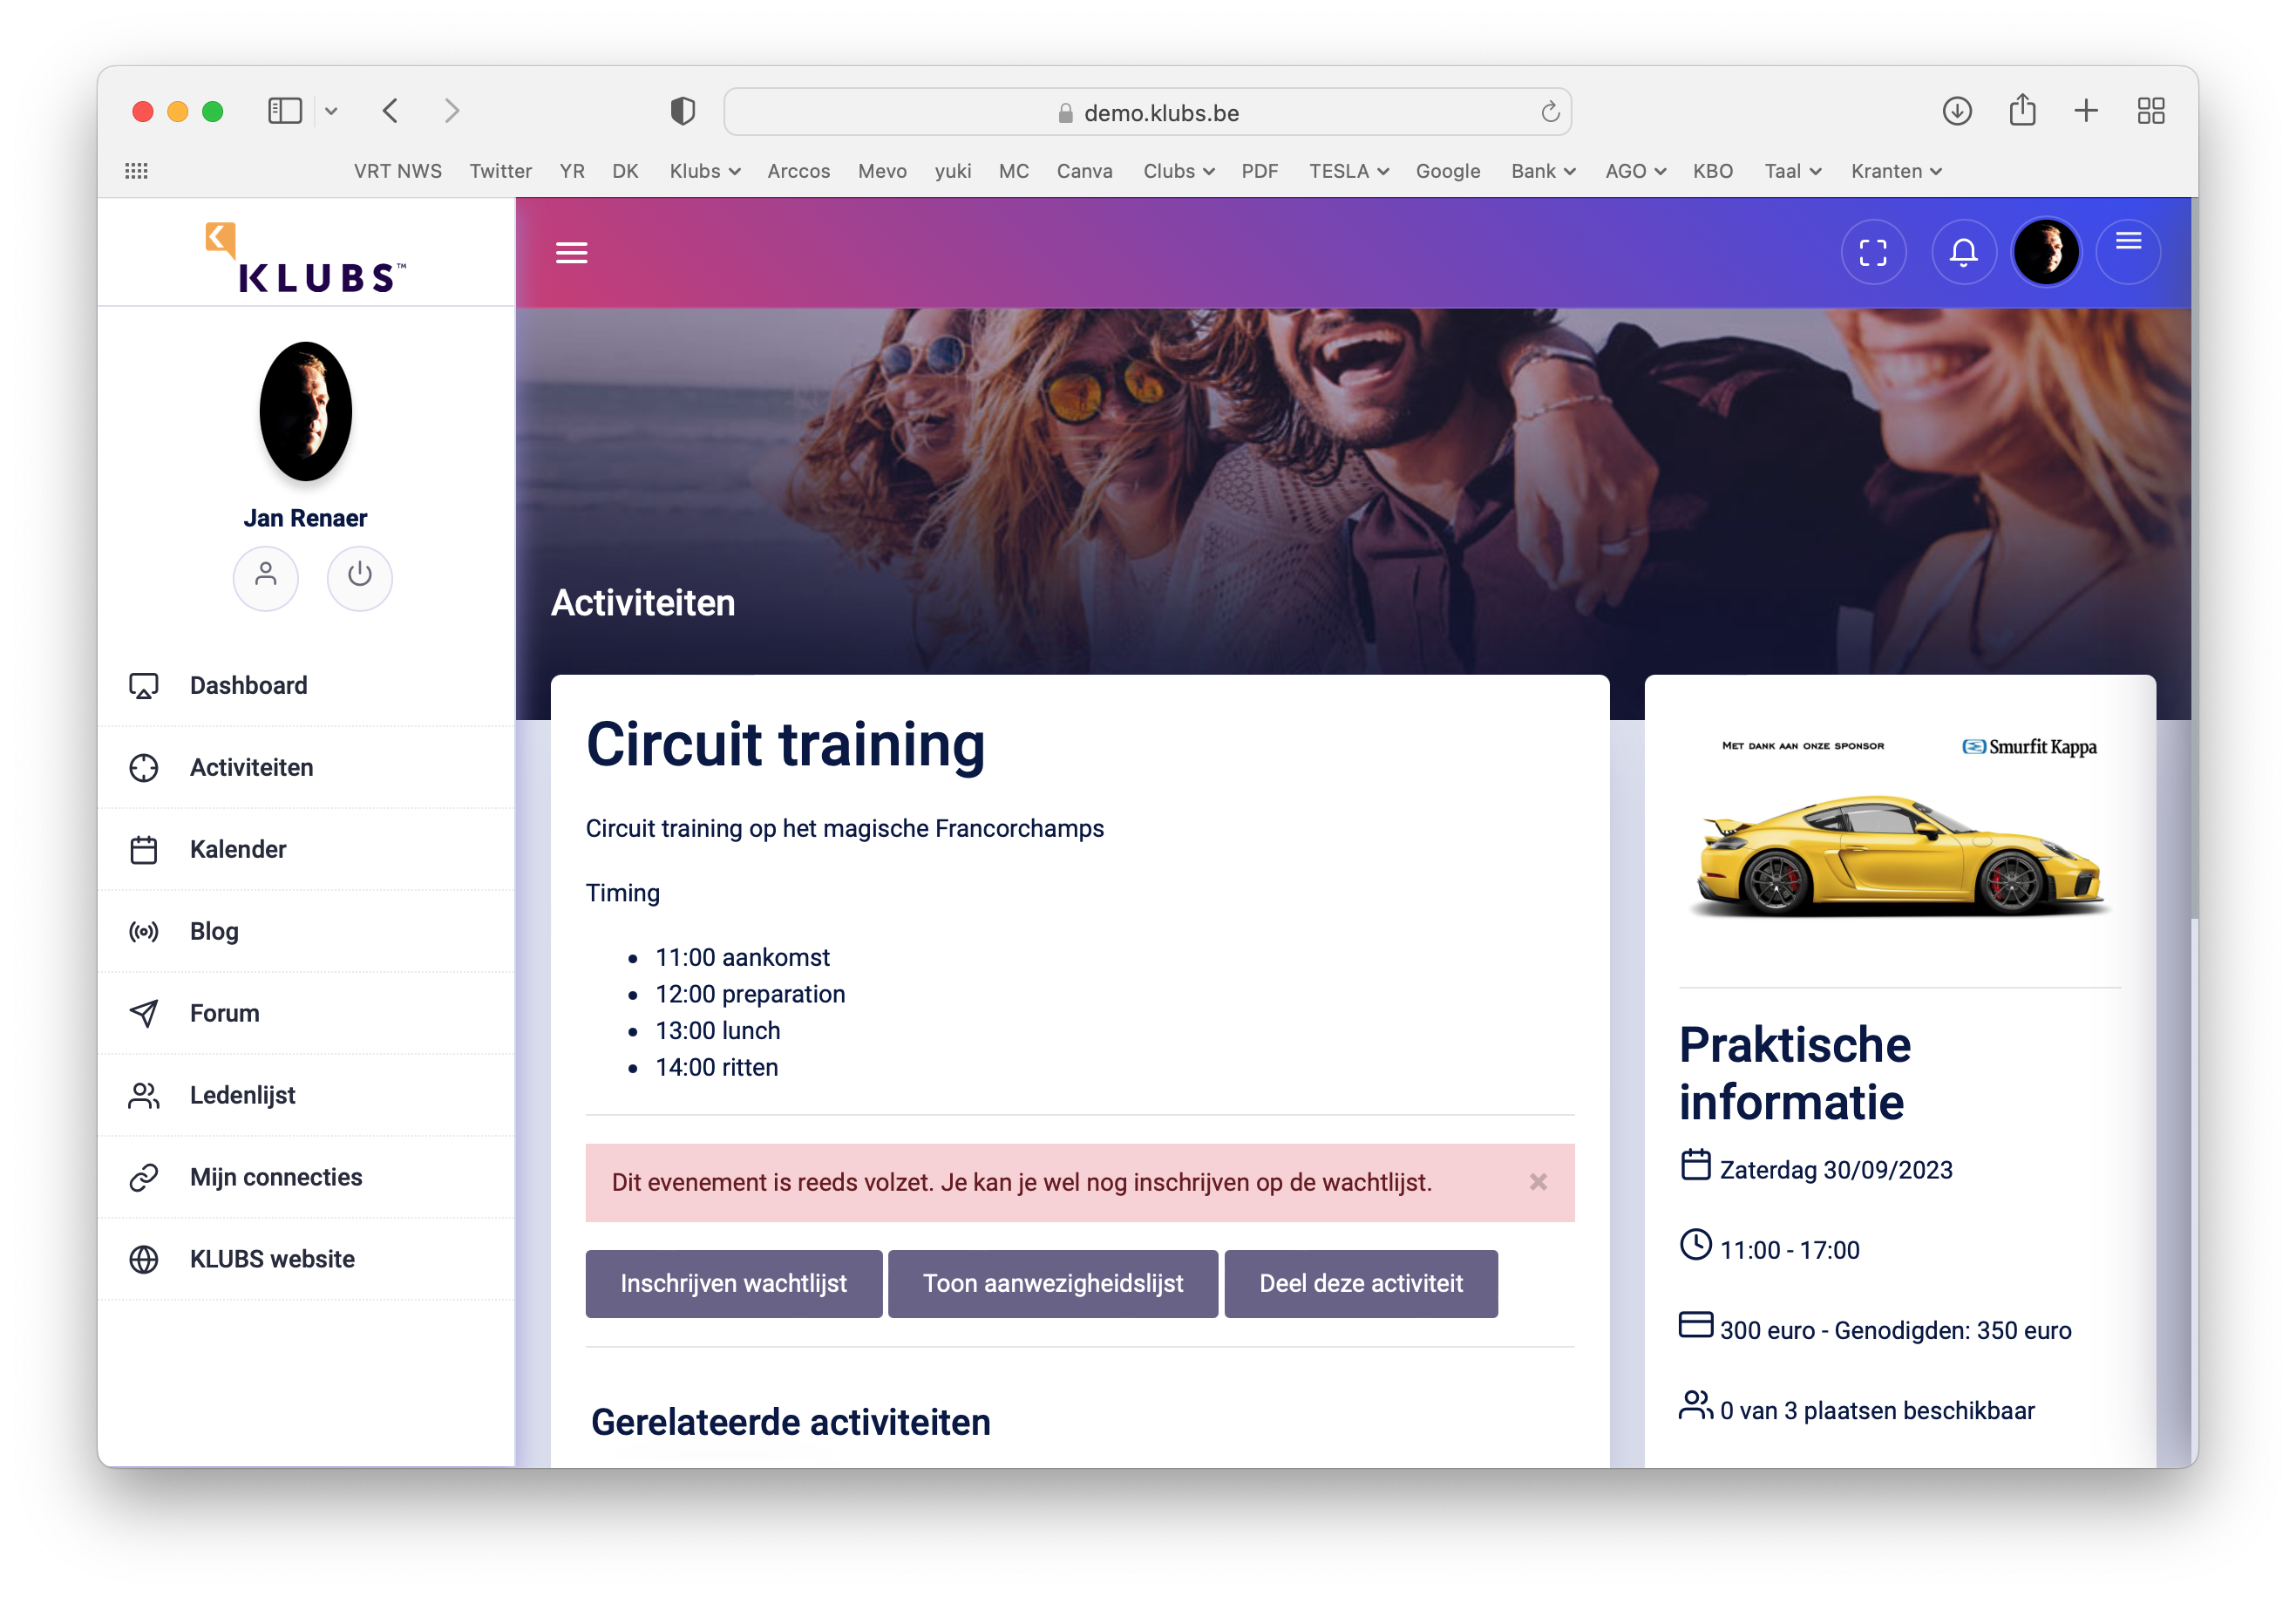
If the number of registrations is limited (number determined in the Event Settings - Total number of places available), only this number of people can also register.

In the event of additional registrations, they will be placed on the waiting list, and these participants will receive a notice and also a separate email with information about their enrollment on the waiting list.

This is clearly indicated in the activity summary list, see last line table:
- 20: number of seats available
- 43: number of registrations - so presumably some on the waiting list
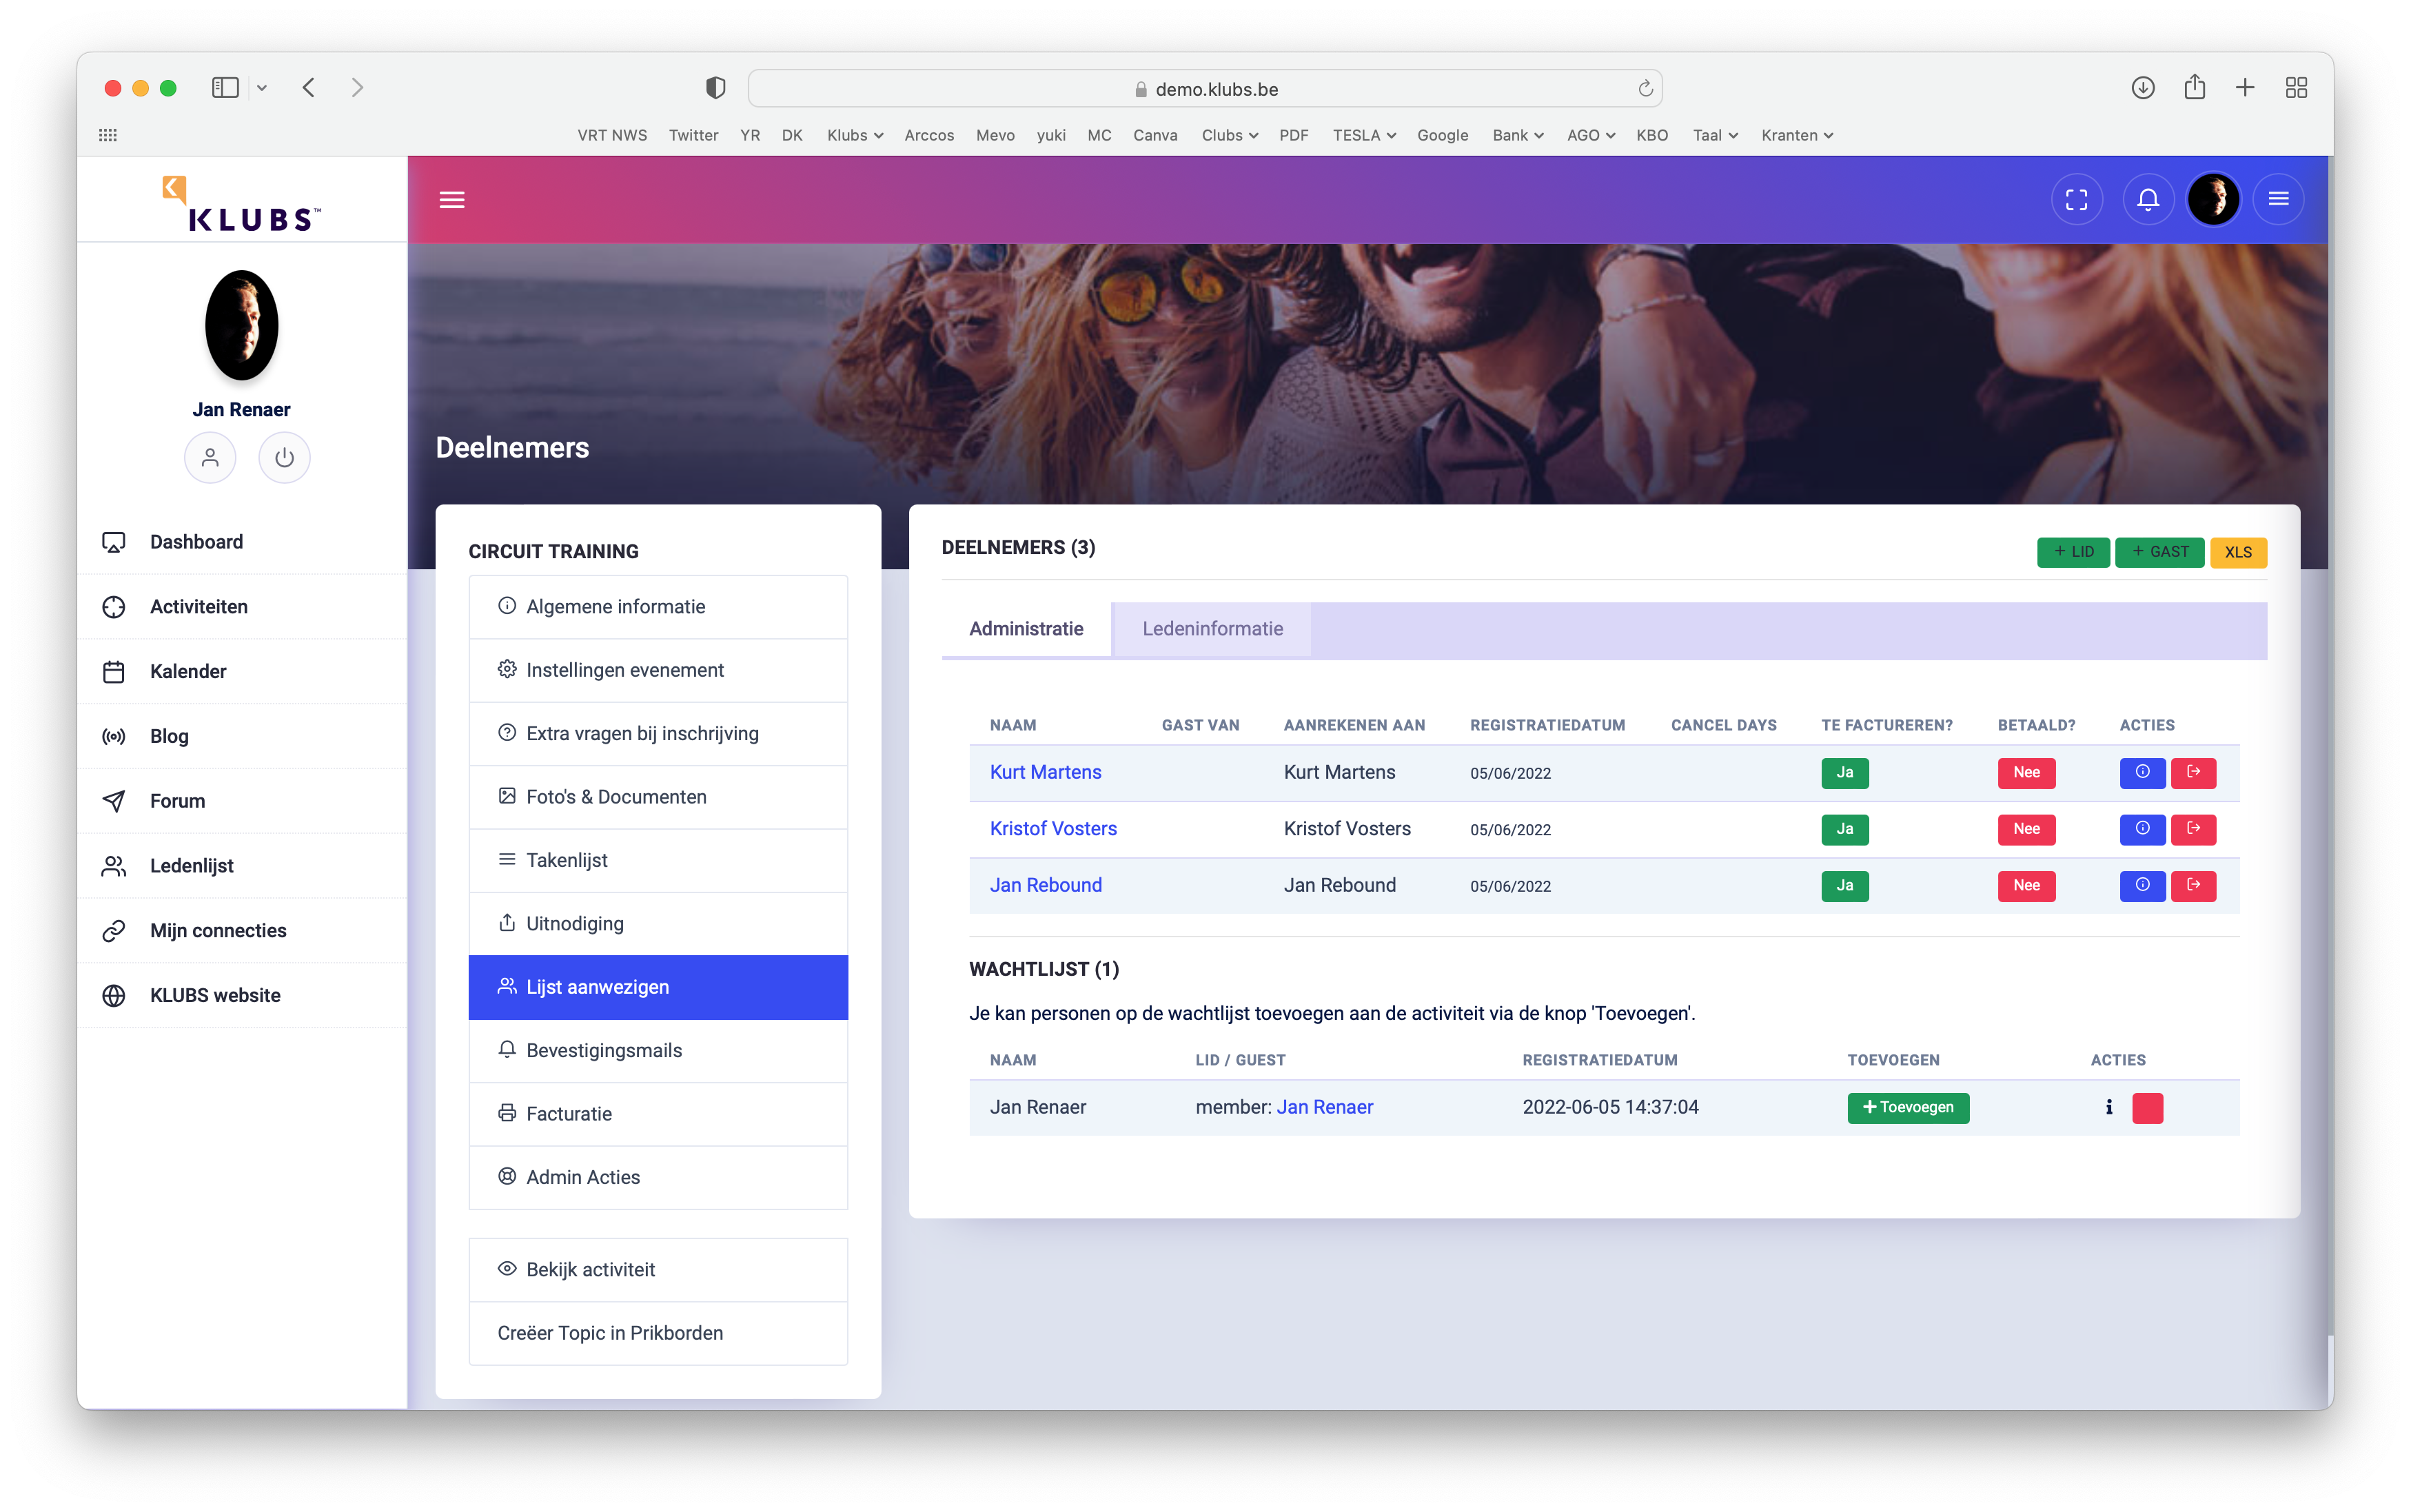
However, it is understood that the club administrator remains in control of what he does with the waiting list. You can do this by going to the Admin of the Activity, and looking at List of Attendees. If there is a waiting list, it will appear at the bottom of the table.You can also edit this waiting list, for example, for participants who indicate that they no longer want/cannot be on the waiting list.
Edit via the ⓘ button, delete via the 🗑 button.
If you want to move someone from the waiting list to the participant list, you can add them manually via the Add Participant button.
Activity - External Organization
For activities, published for members, but where registration is through an external organization, this can be indicated in the Activity Settings (Indication - Registrations through external organization?).

This results in the RSVP Buttons not appearing on the invitation mailing and the omission of the Register button at the Activity. And also indication on the Practical Details on the Activity.

The details of the activity should then include the modalities of registration, through the external organization.